


8 Essential Painting and Decorating Tips for Home Renovation in the West Midlands
- Binon Sellahewa
- Jul 15, 2025
- 14 min read

A fresh coat of paint can revolutionise any space, but achieving a truly professional finish requires more than just a brush and a tin of paint. For homeowners across the West Midlands, from Wolverhampton to Dudley, undertaking a home renovation project often starts with painting and decorating. Whether you're refreshing a single room after a small repair or embarking on a full house renovation in Wolverhampton, mastering a few key techniques can make all the difference between an amateur job and a flawless, long-lasting result.
This guide provides actionable painting and decorating tips that go beyond the basics, offering the same insights our professional property maintenance teams use to deliver exceptional results. We'll cover everything from meticulous surface preparation to the final stroke, ensuring your next project—be it a kitchen fitting, bathroom renovation, or simply updating your living room walls—is a resounding success. These proven methods, focused on reliability and quality, are designed to help you achieve a durable, high-quality finish that enhances your property's value and your daily enjoyment of it. By focusing on customer satisfaction and technique, you can tackle your next project with confidence.
1. Proper Surface Preparation: The Foundation of a Perfect Paint Job
While choosing the perfect paint colour gets most of the attention, the secret to a professional, long-lasting finish lies in the work you do before ever opening a can. Professional painters and decorating experts agree that meticulous surface preparation is the most critical stage. Skipping this step is a false economy, often leading to peeling, bubbling, and an uneven finish that requires costly fixes down the line. For any home renovation project, getting this right ensures reliability and quality from the start.
For any property maintenance task, from a full kitchen fitting to a simple bedroom refresh, treating the surface correctly is non-negotiable. This means going beyond a quick wipe-down. It involves a systematic approach to ensure the new paint adheres perfectly and looks flawless, a hallmark of our customer satisfaction promise.
Key Preparation Steps
Thorough Cleaning: Walls accumulate grease, dust, and grime that can prevent paint from sticking. Use a sugar soap solution to wash down all surfaces, paying special attention to kitchens and bathrooms where residues can settle. This step is a cornerstone of any effective deep cleaning routine, as detailed in our guide to revitalising your home.
Sanding and Filling: After cleaning, fill any cracks or holes with a quality filler and sand them smooth once dry. Lightly sand all surfaces to "key" them, which creates microscopic grooves for the primer to grip. For flooring prep or woodwork, always sand in the direction of the grain to avoid scratches.
Priming: Primer is the essential bridge between your surface and the topcoat. It seals the surface, blocks stains from bleeding through, and provides a uniform base, ensuring your final colour looks true and even. For a reliable finish, never skip primer.
The following infographic illustrates the essential workflow for perfect paint preparation.
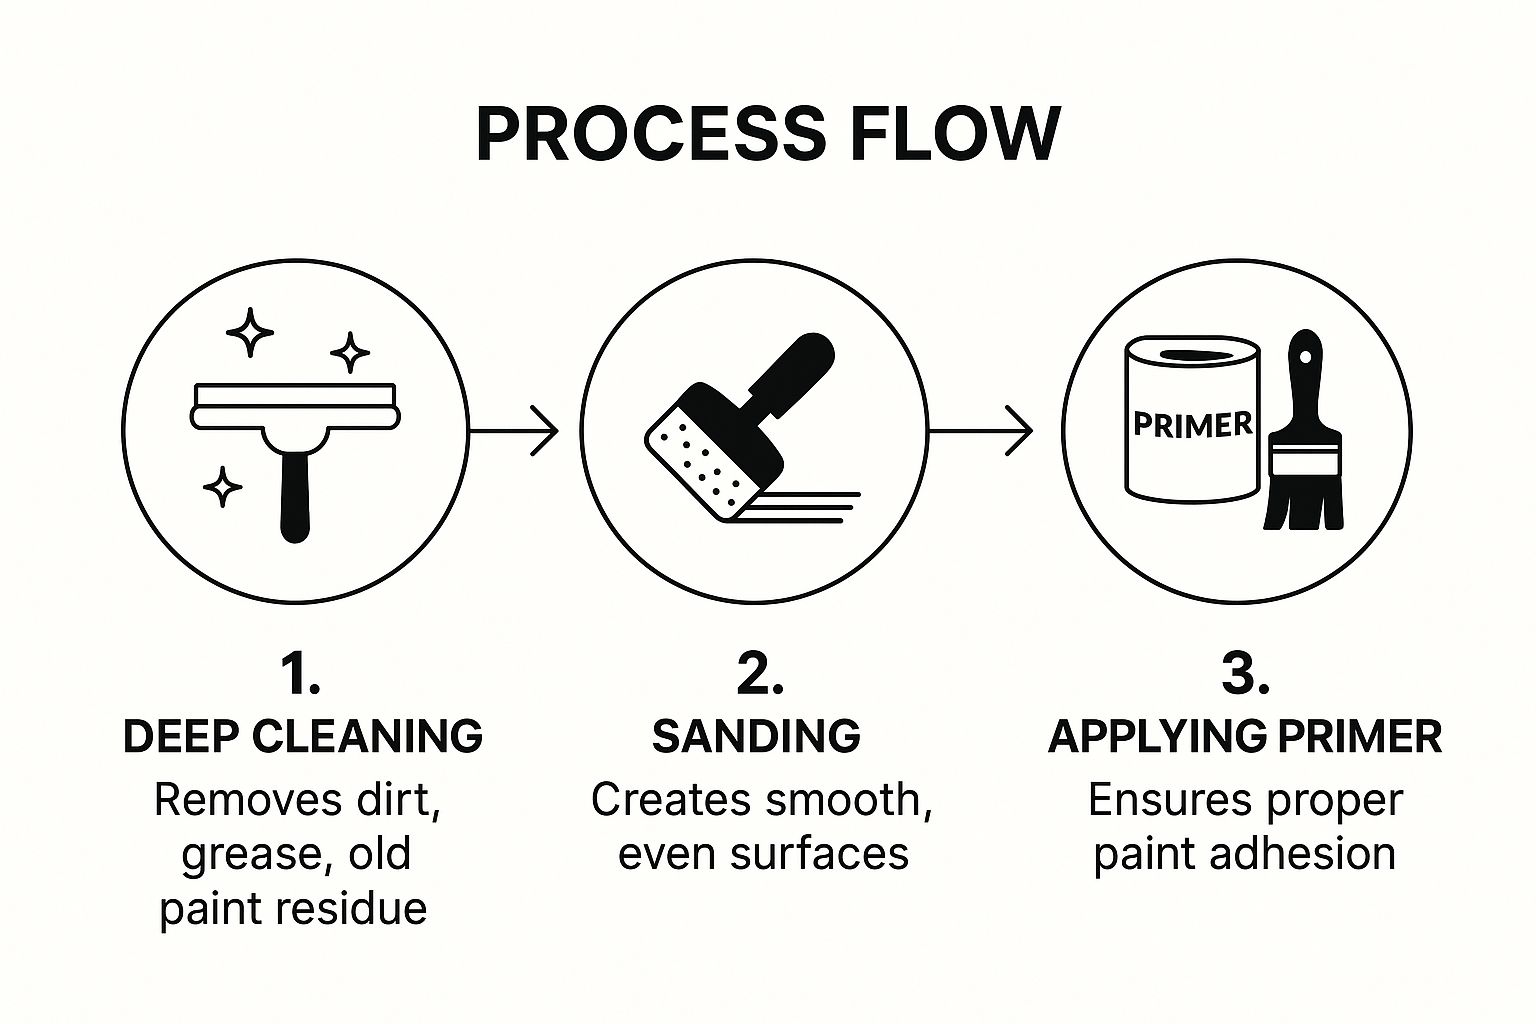
As the diagram shows, each step builds upon the last to create the ideal foundation for a professional Painting job, a crucial sequence for achieving quality results in any decorating project.
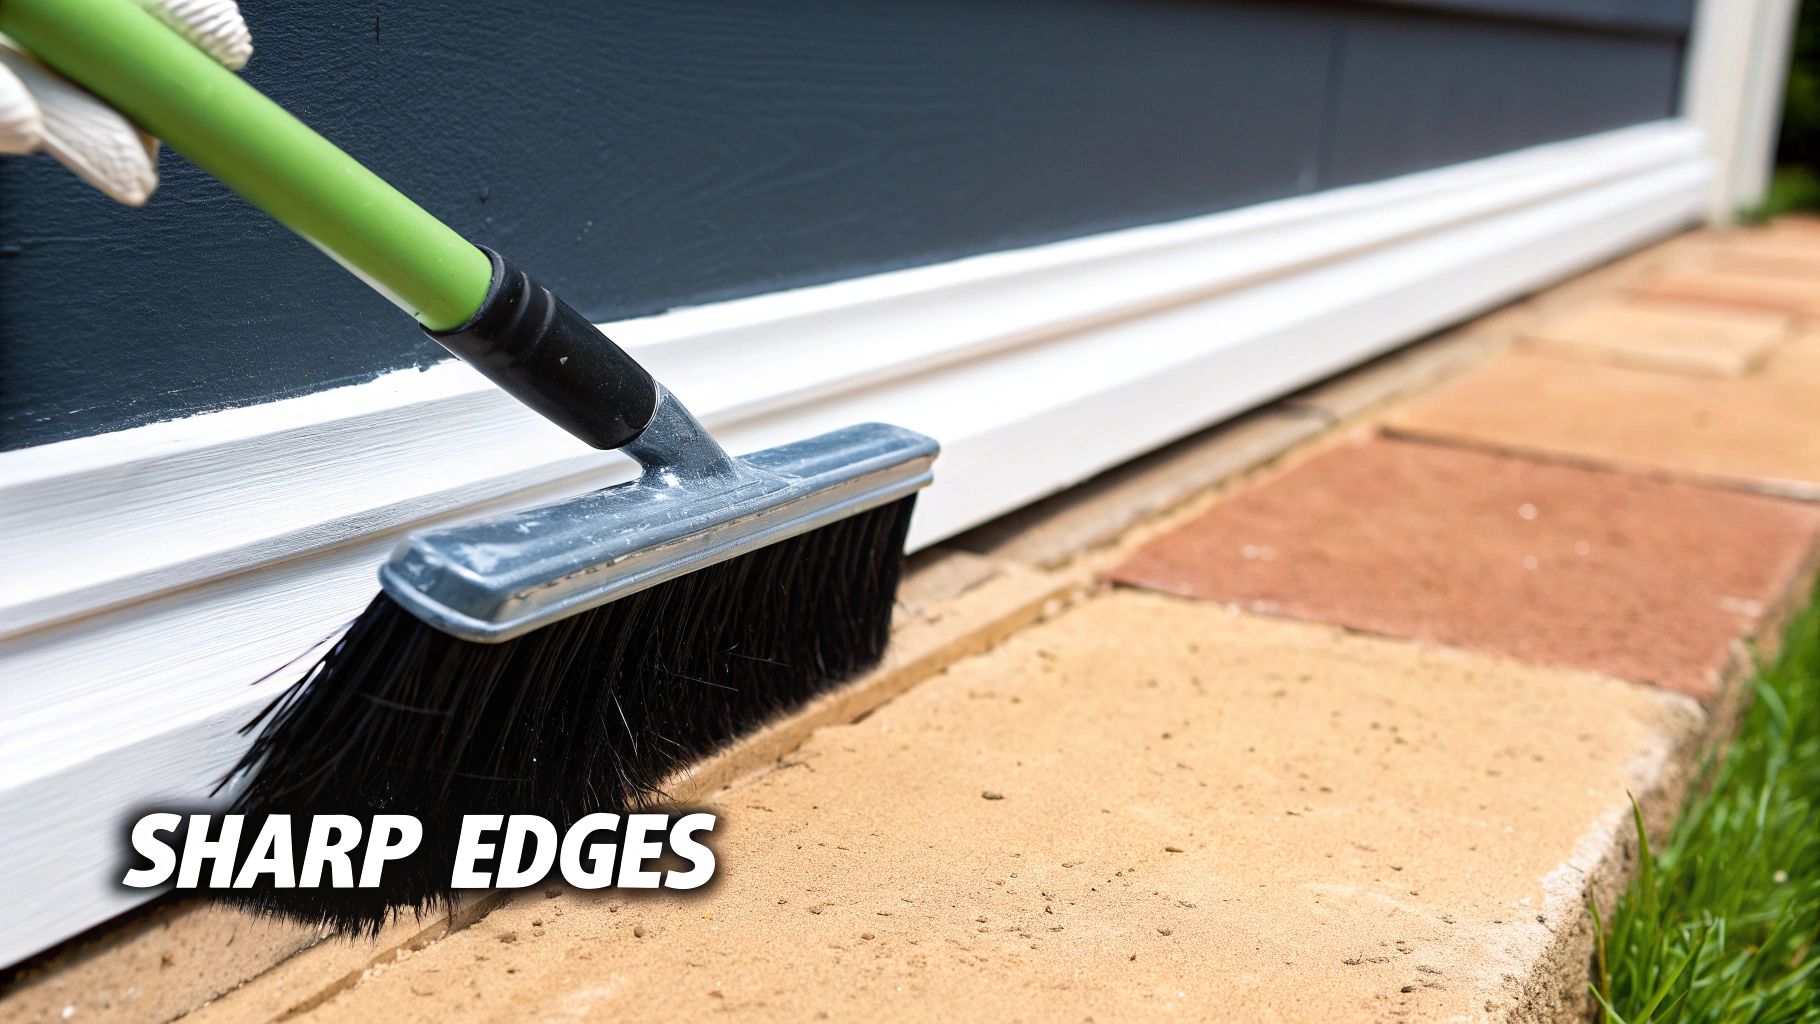
2. Mastering the 'Cut-In' Technique for Razor-Sharp Edges
Achieving those perfectly crisp lines where walls meet ceilings, skirting boards, or window frames is the hallmark of a professional painter. This precision isn't achieved with masking tape alone but through a fundamental skill known as 'cutting in'. Our expert teams, including our trusted handyman in Dudley, rely on this technique daily. It involves using a high-quality angled brush to paint edges and corners before rolling the main surfaces. It’s an essential part of any high-quality painting and decorating project, ensuring complete and neat coverage where rollers simply can't reach.
For any homeowner undertaking a renovation, whether it's an accent wall in a Wolverhampton living room or refreshing the trim as part of a bathroom renovation, mastering this technique separates a DIY attempt from a professional finish. It ensures that the final look is seamless, with no gaps or messy overlaps between different colours or surfaces.
Key Cutting-In Steps
Choose the Right Tool: A 2 to 2.5-inch angled sash brush is the tool of choice for professionals. The angled bristles offer superior control, allowing you to create a sharp line with precision.
Load the Brush Correctly: Dip the brush about a third of the way into the paint. Tap it gently against the inside of the can to remove excess; avoid scraping the bristles on the rim, as this removes paint unevenly. You want a loaded brush, not a dripping one.
Create a Guideline: Start by painting a line about an inch away from the edge. Then, on your second pass, use the angled tip of the brush to push the paint smoothly and steadily right up to the line, creating a clean border.
Work in 'Wet' Sections: Cut in a manageable section of about 3-4 feet at a time, then immediately use your roller on the main wall area. This allows the brushed and rolled paint to blend seamlessly while still wet, preventing visible lines known as 'picture framing'.
This video from a professional painter demonstrates the steady hand and fluid motion required for perfect cutting in.
By following these professional painting and decorating tips, you can achieve flawlessly sharp edges that elevate the finish of any room, a critical step in achieving a polished, reliable look for your home renovation.
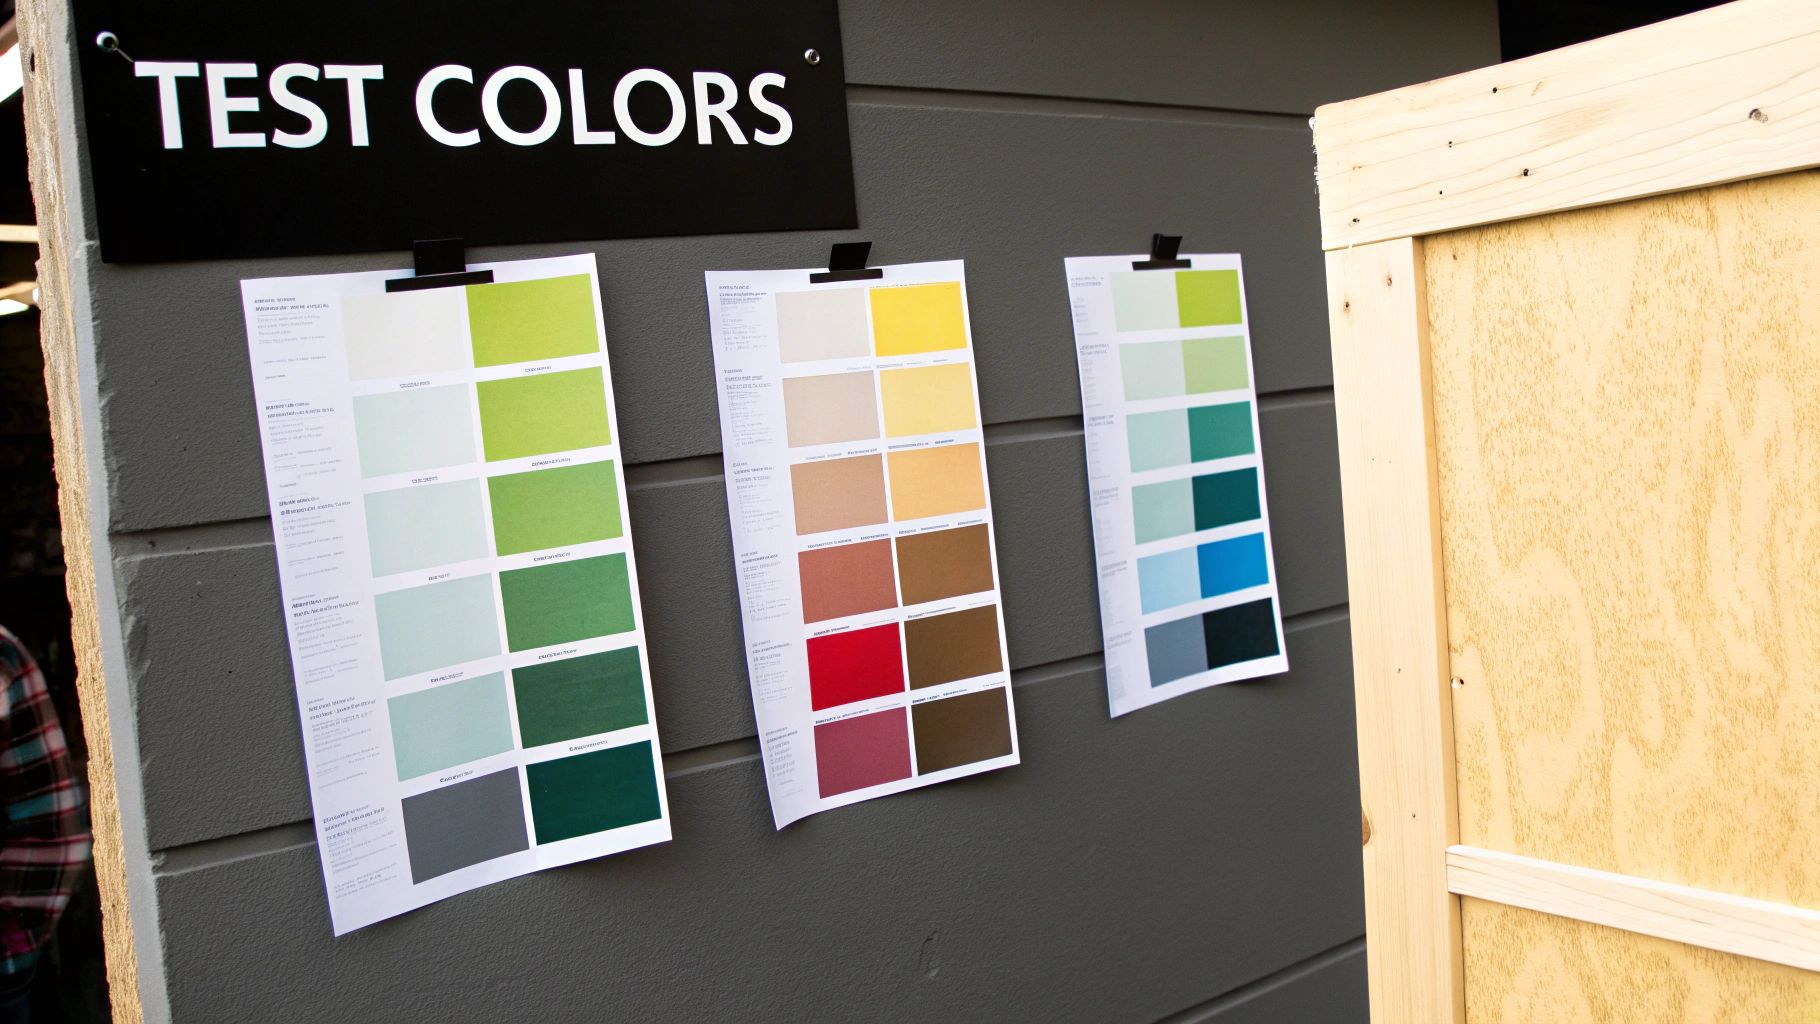
3. Strategic Colour Selection and Testing: See Before You Commit
Selecting a paint colour from a tiny swatch under harsh shop lighting is a common mistake that can lead to disappointing results. Strategic colour selection is a more deliberate, solution-focused process. It involves understanding how light, space, and undertones interact to create the perfect atmosphere, moving beyond guesswork to an evidence-based decision.
This methodical approach is crucial for any home renovation in the West Midlands, whether you're undertaking a full kitchen fitting in Wolverhampton or simply refreshing a bedroom in Dudley. It ensures the final colour aligns with your vision and complements your home’s unique character, preventing the costly and time-consuming process of repainting and ensuring customer satisfaction.
Key Colour Testing Steps
Test in Situ: Never finalise a colour based on a small chip. Instead, paint a large sample (at least A4 size) onto a poster board or directly onto the wall. This allows you to see how the colour truly behaves in your space without committing to the full job.
Observe in All Lights: Place your large samples on different walls within the same room. Observe them throughout the day and night to see how the colour changes with shifting natural light and under your artificial lighting in the evening. A colour that looks perfect in the morning sun might appear completely different at night. For more detailed guidance, explore our guide on how to choose paint colours for your West Midlands home.
Consider Room Function: Think about the desired mood. Warm colours can create a cosy, inviting feel perfect for a living room, while cool colours often promote calmness, making them ideal for bedrooms or offices.
Apply the 60-30-10 Rule: For a balanced colour scheme, apply your dominant colour to 60% of the room (usually the walls), a secondary colour to 30% (e.g., furniture, feature wall), and an accent colour to the final 10% (e.g., cushions, art). This is one of the most effective painting and decorating tips for achieving a professional, cohesive look.
4. Quality Tool Investment Strategy
While a budget-friendly approach might seem tempting, seasoned professionals understand a core principle of property maintenance: the quality of your finish is directly tied to the quality of your tools. A painter needs high-performance equipment to deliver superior results, making a quality tool investment a strategic decision rather than a mere expense. This commitment to quality is what our customers value.
This strategy involves prioritising performance and longevity over initial cost. High-quality brushes and rollers hold and release paint more evenly, reducing the need for multiple coats, minimising drips, and creating a smoother, more professional finish. For any project, from a bathroom renovation in Dudley to a full house renovation in Wolverhampton, the right tools save time, reduce paint wastage, and prevent the frustration of a subpar outcome.
Key Investment Steps
Choose the Right Brush: For precise "cutting in" around skirting boards and windows, a high-quality angled brush is invaluable. They feature bristles that maintain their shape and don't shed, ensuring clean lines and a flawless, reliable finish.
Select the Correct Roller: The roller sleeve's nap (its thickness) is crucial. Use a shorter nap for smooth surfaces like new plasterboard and a longer nap for textured walls. Investing in a sturdy roller frame and extension pole will also make the job faster and more comfortable, especially when tackling large areas or new Flooring perimeters.
Prioritise Proper Care: The lifespan of premium tools depends on their upkeep. Clean brushes and rollers thoroughly immediately after use with the appropriate solvent (water for latex, white spirit for oil-based paints). Store brushes in their original keepers or hang them to maintain bristle shape.
This considered, solution-focused approach to tooling is fundamental to achieving a high-end look that lasts. The debate between initial cost and long-term value is a common one in home improvement, a topic we explore further in our guide to making smart choices between price or quality. Ultimately, investing in quality tools is a cornerstone of effective painting and decorating tips that ensures your hard work pays off.
5. The 'Wet Edge' Technique: Your Secret to a Flawless, Streak-Free Finish
One of the most telling signs of a DIY paint job versus a professional one is the presence of "lap marks". These are unsightly, darker streaks that appear where wet paint has overlapped a section that has already started to dry. The solution is mastering the "wet edge" technique. This method is fundamental to achieving a seamless, uniform colour, especially on large, open-plan walls. Our teams use this technique to ensure total customer satisfaction on every job.
Maintaining a wet edge means you always apply new paint onto the wet border of the previously painted section. This approach allows the layers to blend together perfectly before they have a chance to dry, eliminating visible seams. For large-scale projects, such as an open-concept living area in a Wolverhampton home or a feature wall in a new kitchen fitting, this technique is non-negotiable for a premium, reliable result.
Key Application Steps
Work in Manageable Sections: Don’t try to paint an entire wall from top to bottom in one go. Instead, work in small, manageable vertical sections (about one to two feet wide). Complete each section fully from ceiling to floor before moving to the next.
Roll into the Wet Area: Always start your roller in the unpainted area and roll back towards the wet edge you just created. This ensures you are constantly blending the new paint into the previous stroke, maintaining a continuous wet border.
Maintain Consistent Pressure: Apply even pressure with your roller throughout the process. This prevents paint build-up along the edges of the roller, which can cause lines and an uneven texture.
Plan Your Sequence: Before you start, plan your painting route around the room. Aim to work away from the light source and tackle the largest, most visible walls first. This systematic, solution-focused approach helps you maintain momentum and keep that critical edge wet.
6. Primer Selection and Application: The Unsung Hero of Paint Longevity
While often seen as an optional extra, primer is the fundamental building block of a durable and professional-looking paint job. It’s the unsung hero that solves problems before they start. Skipping primer, especially in demanding environments like a bathroom renovation or over tricky surfaces, is a common pitfall that leads to poor adhesion, uneven colour, and stains bleeding through—compromising the quality of the finish.
Think of primer as the ultimate diplomat between the wall and the paint. Its job is to create a neutral, uniform surface that bonds securely to the substrate while providing the perfect canvas for your topcoat. This ensures your chosen colour looks rich and true, without interference from what lies beneath. From preparing kitchen cabinets for a new look to tackling a full house renovation, using the right primer is one of the most impactful painting and decorating tips for a reliable, long-lasting finish.
Key Primer Application Tips
Match Primer to Surface: Different surfaces have different needs. A high-adhesion bonding primer is essential for glossy, non-porous surfaces like laminate cabinets or ceramic tiles. For fresh plasterboard, a sealing primer is needed to prevent the porous surface from absorbing your expensive topcoat. For exterior work, a dedicated exterior primer offers enhanced durability and weather resistance. For more insights on outdoor projects, see our guide on exterior maintenance and painting.
Don't Rely on "Paint-and-Primer-in-One": While convenient for simple jobs, these combination products are rarely a substitute for a dedicated primer, especially when covering dark colours, blocking stubborn stains, or painting challenging materials. A separate, targeted primer will always deliver superior performance and quality.
Apply Thin, Even Coats: Just like with your topcoat, apply primer in a thin, consistent layer. Over-application can lead to drips and an uneven texture that will show through your final paint colour. Use a quality brush or roller and work methodically across the surface.
Respect Curing Times: Primer needs time to cure properly to do its job. Rushing to apply the topcoat can compromise its ability to block stains and create a strong bond. Always check the manufacturer's instructions for recommended drying and curing times before you start Painting.
7. Proper Paint Loading and Application Patterns
The way you load your tools and apply paint to a surface is just as important as the quality of the paint itself. Adopting systematic application patterns is one of the most effective painting and decorating tips for achieving a flawless, even finish without drips or roller marks. This methodical, solution-focused approach ensures consistent coverage, especially on large, flat areas like walls and ceilings.
For any homeowner in Wolverhampton undertaking a house renovation, moving beyond random, haphazard strokes is key to a professional outcome. The goal is to distribute paint evenly and efficiently, avoiding the common DIY pitfalls of thin patches and visible lines. This method elevates a simple paint job into a high-quality decorating project that ensures customer satisfaction.
Key Application Techniques
Roller Loading and the 'W' Pattern: Avoid dipping your roller completely into the paint. Instead, roll it back and forth on the ribbed ramp of your tray until it's evenly coated but not dripping. To apply paint to a wall, start by rolling a large 'W' or 'M' shape, then fill it in with parallel, slightly overlapping strokes without lifting the roller. This technique prevents heavy paint lines and ensures uniform coverage.
Brush Loading (Cutting In): When cutting in around edges, dip only the first third of your brush bristles into the paint. Tap the brush gently against the inside of the can or pail to remove excess; never scrape it on the rim. This gives you maximum control and prevents drips, allowing for a crisp, clean line against trim or ceilings.
Maintaining a Wet Edge: Always work from a wet edge into a dry area. This means overlapping each new stroke of your roller or brush onto the previous one while it is still wet. This process helps the paint blend seamlessly, eliminating visible lap marks and creating a smooth, continuous surface.
By mastering these fundamental application skills, you ensure your efforts in preparation pay off with a superior finish. You can explore these methods further in our comprehensive guide to interior paint, which details the entire process from start to finish.
8. Environmental Control and Timing: Mastering the Elements for a Flawless Finish
The success of a paint job doesn’t just depend on your technique; it’s also heavily influenced by the environment you’re working in. Professional property maintenance experts understand that factors like temperature, humidity, and airflow are critical. Ignoring these elements can sabotage your efforts, leading to common problems like slow drying, poor adhesion, or streaking.
Mastering environmental control is a cornerstone of professional painting and decorating, whether for an extensive house renovation in Wolverhampton or a simple feature wall. It ensures the paint cures correctly, delivering the durable, high-quality finish you expect. This is especially true for projects in the West Midlands, where fluctuating weather can impact both interior and exterior work.
Key Environmental Factors
Temperature and Humidity: Most paints perform best within a specific temperature range, typically between 10°C and 30°C. High humidity slows down the drying process for water-based paints, while very low humidity can cause them to dry too quickly, leading to brush marks. For exterior projects, checking the weather forecast is essential to avoid painting just before rain.
Ventilation: Good air circulation is vital for helping paint dry evenly and for dispersing fumes. However, avoid pointing a fan directly at a wet surface, as this can create an uneven, rippled texture. Instead, use fans to circulate air throughout the room.
Lighting: Painting in poor light is a recipe for missed spots and uneven coverage. Use strong, mobile work lights to illuminate the area, mimicking daylight as much as possible. This allows you to see the true colour and spot any imperfections before the paint fully dries.
By managing the environment, you control the outcome. This professional, solution-focused approach, crucial for everything from a complex bathroom renovation to a straightforward room repaint, ensures the job is done right the first time, preventing costly corrections and ensuring a reliable result.
Painting & Decorating Tips: 8-Point Comparison
Aspect | Proper Surface Preparation | The 'Cut-In' Technique | Strategic Color Selection and Testing | Quality Tool Investment Strategy | The 'Wet Edge' Technique | Primer Selection and Application | Proper Paint Loading and Application Patterns | Environmental Control and Timing |
|---|---|---|---|---|---|---|---|---|
Implementation Complexity 🔄 | Medium to high: multiple detailed steps | High: requires skilled steady hand | Medium: involves systematic testing | Medium: involves selecting and maintaining tools | High: needs quick, continuous work | Medium: selecting correct primer and application steps | Medium: mastering consistent patterns | Medium to high: monitoring and adjusting conditions |
Resource Requirements ⚡ | Moderate: cleaning agents, sandpaper, primers | Low: brush and paint; high skill needed | Moderate: multiple samples and test areas | High: upfront investment in quality tools | Moderate: adequate paint and possibly helpers | Moderate: different primers per surface | Low to moderate: quality paint and tools | Moderate: monitoring devices, fans, and timing |
Expected Outcomes 📊 | ⭐⭐⭐⭐⭐: durable, smooth, long-lasting finish | ⭐⭐⭐⭐: precise, clean edges | ⭐⭐⭐⭐: accurate color matching, cohesive aesthetics | ⭐⭐⭐⭐: professional finish, reduced waste | ⭐⭐⭐⭐: seamless paint appearance, uniform sheen | ⭐⭐⭐⭐: improved adhesion and stain blocking | ⭐⭐⭐⭐: even coverage, minimal marks | ⭐⭐⭐⭐: optimal curing, fewer defects |
Ideal Use Cases 💡 | Prep for all painting projects, especially restoration | Detail work on edges, trim, and corners | Design-focused projects requiring color accuracy | Frequent painters wanting lasting tools | Large surface painting needing flawless finish | Surfaces prone to staining or adhesion issues | Any project needing smooth, even paint distribution | Projects sensitive to weather, indoor/outdoor conditions |
Key Advantages ⭐ | Prevents peeling, color issues; extends paint life | Sharp edges without tape; saves time with skill | Reduces color errors; enhances room appearance | Better finish, tool longevity, less waste | Eliminates lap marks; professional look | Improves adhesion; prevents stains; saves coats | Efficient, controlled application; professional results | Enhances durability; prevents common paint failures |
Your Next Step to a Perfect Finish in the West Midlands
Embarking on a painting and decorating project can be an incredibly rewarding experience, transforming the feel of your home and adding significant value. Throughout this guide, we've explored the foundational pillars of a professional-quality finish, moving far beyond generic advice to give you actionable, solution-focused strategies. These are the very same principles that our seasoned professionals in Wolverhampton and across the West Midlands rely on daily to ensure quality and customer satisfaction.
Mastering these techniques will empower you to tackle your next project with confidence. By now, you understand that a flawless result isn't about luck; it's a direct outcome of diligent preparation, methodical application, and a deep respect for the materials and tools you use. The difference between an amateur job and a stunning, long-lasting finish lies in these crucial details.
Key Takeaways for a Professional Finish
Let's recap the most impactful insights that will elevate your work:
Preparation is Paramount: Never underestimate the power of proper surface preparation. As we covered, cleaning, sanding, and filling imperfections are not optional steps; they are the bedrock upon which a perfect paint job is built.
Technique Defines Quality: The 'cut-in' technique and maintaining a 'wet edge' are non-negotiable for achieving seamless, streak-free walls. These methods separate a DIY look from a truly professional outcome.
Strategic Investment Pays Off: Your choice of tools and primers directly influences the final result. Investing in quality brushes, rollers, and the correct primer for your specific surface saves you time, effort, and frustration in the long run.
Colour and Environment Matter: Thoughtful colour testing in your home's unique light and controlling the environment for optimal drying are the final, crucial pieces of the puzzle. These steps ensure the colour you envisioned is the colour you get, and that the finish is durable and unblemished.
From DIY Confidence to Professional Perfection
Applying these painting and decorating tips will undoubtedly set you on the path to success. However, we recognise that major projects, such as a complete house renovation in Wolverhampton or a complex bathroom renovation, involve much more than a single coat of paint. They require a symphony of skills, including carpentry, plumbing, and Flooring, all working in harmony. A Full Renovation requires a dedicated team.
For homeowners, landlords, and business owners in Dudley and the wider West Midlands, the time and expertise required for such large-scale property maintenance can be overwhelming. This is where professional support becomes not just a convenience, but a smart investment. When you need guaranteed quality, reliability, and a finish that stands the test of time for your kitchen fitting or commercial upkeep, calling in a trusted team like a handyman in Dudley is the most effective path forward. Your property is a significant asset, and it deserves a level of craftsmanship that reflects its value.
Ready to transform your space with guaranteed professional results? For everything from flawless Painting and decorating to a full house renovation, trust the experts at Ro Maintenance Ltd. Contact us today for a no-obligation quote and let our skilled team in the West Midlands bring your vision to life with precision, quality, and care.
Article created using [Outrank](https://outrank.so)


Comments